Centipede: Building a 2:1 Scale Centipede Arcade Cabinet Replica
Introduction
Centipede is a classic arcade game from the early 80s, made by Atari. I'd never had a chance to play it in an arcade, but was familiar with it through its console ports. However, console ports of centipede are typically missing one of it's most striking features; a trackball. This got me thinking, it'd be great to try out the arcade version of Centipede, with a trackball, as intended.
Of course, there are some practical considerations here. Centipede arcade machines are hardly a fixture of modern life. Buying one would be possible, but costly, and I wasn't even sure if I liked it, having never played it properly. Additionally, an original cabinet would require quite a bit of space, and unfortunately, I don't have the space for a home arcade. I don't even have space for a home workshop (more on that later)!
This brings us to the solution; building a a 2:1 scale Centipede arcade cabinet replica. There are other similar solutions, of course , like professional reproductions from RepliCade and others, but those all use LCD screens (which are better, but missing that arcade je ne se qiox), and I like building things myself, in and of itself. I find making fulfilling, and it's nice to be able to customize it exactly how you want it to be. Below I discuss the design and implementation of the machine, as well as hiccups along the way, and what I learned (including what I might have done differently if I did it again). I will also note what things I would like to add to the project at some point.
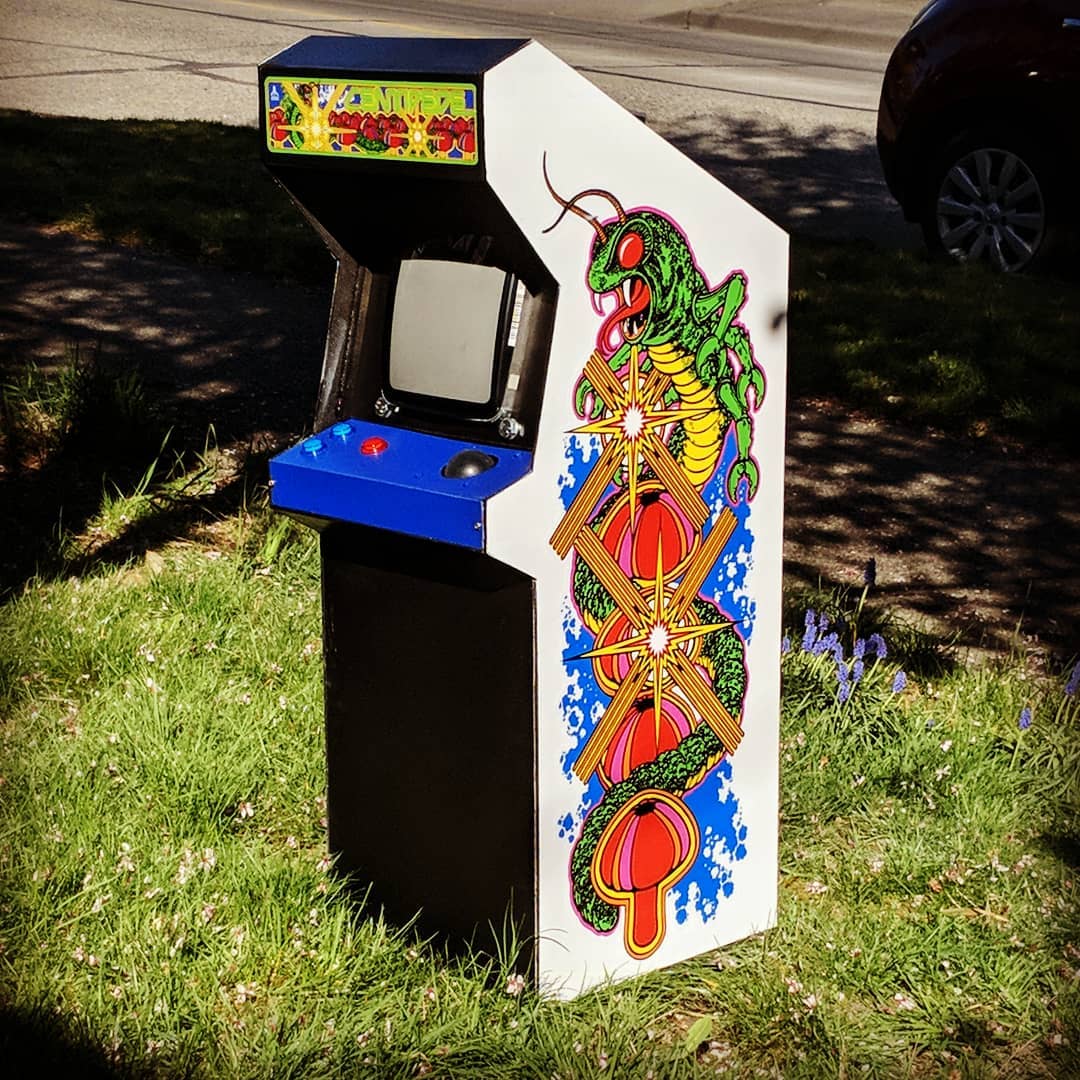
Figure 1

Figure 1 above shows the completed project. Click image to enlarge.
Design
This project was not extensively designed before I started building it. I had seen some YouTube videos of a construction style I wanted to immitate, and I had a small CRT TV I had aquired from a Goodwill thrift shop, but I didn't expect to get particularly excellent results, and planned on throwing together something to would work. Quickly as I started work, I realized that this was a better idea than I had realized, and started taking the project more seriously.
The construction method I wanted to emulate was to make all of the panels of the arcade machine with 1/8 inch tempered hardboard (the kind of sheets that are typically used for peg-boards), and 3/8 inch square dowel rods (the sort that may be found at a hobby shop) at the intersection of each of the panels, secured with wood glue. I had built a small arcade machine before with more traditional 3/4 inch plywood, and found it unweildy, and overkill. Additionally, the tempured hardboard is extremely affordable, compared to nice plywood, and I thought this method would be easier to rapidly prototype and experiment with, with low risk of material cost waste.
I did have some converns, especially about the sturdiness of this construction method. Fortunately, it has proved sturdy enough by far, although I probably wouldn't feel comfortable trusting its strength to a public unsupervised placement like an actual arcade.
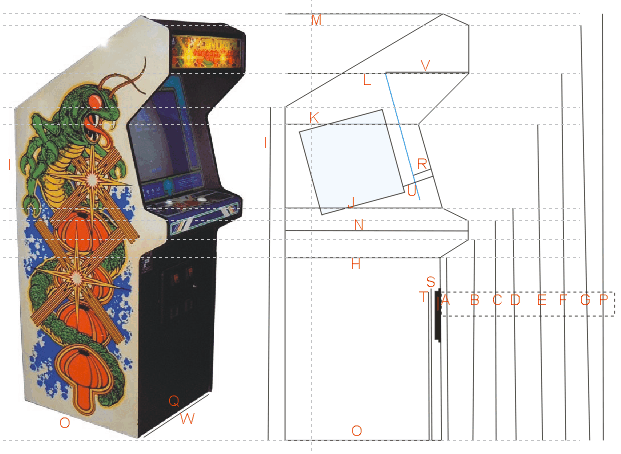
The critical piece for starting construction of the cabinet shape was to find the dimensions of the original arcade cabinet. I found documentation of this at arcadecontrols.com, attibuted to Carsten Carlos. I'm reproducing that information here, in case the link is ever dead at some point in the future. I simply took these dimensions, and divided them in half.
I drew out the outline of the two sides on the tempered hardboard with rulers, and cut a bit (about 1/8 of an inch) outside the lines with a jig-saw. A band saw or scroll saw would probably achieve similar results, perhaps with more accuracy. I knew I would not be able to do accurate enough lines by hand with a jig-saw, which is why I went wide of my lines. To bring my panels down to size, I used a hand plane and a lot of sanding. I used this process throughout the build, sometimes with the addition of a file.
There are only three panels that are not simply rectangles; The two side panels, and the bezel panel. The bezel panel holds the CRT, and because of a CRT's unusual shape (vaguely rectangular, but with rounded edges, and bowed sides), methods like hand planing are not effective. The bezel hole specifically required a lot of time. I cut a very roughly shaped but smaller hole with the jig-saw, and then expanded it as necessary with a file, checking the fit repeatedly throughout. This took a total of a couple of hours, but gave good results, althoughnot quite perfect (there is still some irregularity in the gap around the CRT). Remember when making irregular and difficult holes like this, that you can slow down and take more wood off, but if you take too much off, you've ruined the work, and will have to make the piece again from scratch.
Figure 2

Figure 2 above shows Carstem Carlos's diagram, as found on ArcadeControls.com Click to enlarge.
Table 1
| pos. | cm | inch | pos. | cm | inch | |
| 85,09 | 33.5 | M | 67,31 | 26.5 | ||
| B | 92,075 | 36.25 | N | 81,28 | 32 | |
| C | 100,965 | 39.75 | O | 68,58 | 27 | |
| D | 104,775 | 41.25 | P | 180,975 | 71.25 | |
| E | 137,795 | 54.25 | Q | 64,135 | 25.25 | |
| F | 158,75 | 62.5 | R | 7,62 | 3 | |
| G | 175,895 | 69.25 | S | 76,2 | 30 | |
| H | 68,58 | 27 | T | 73,66 | 29 | |
| I | 142,24 | 56 | U | 13,97 | 5.5 | |
| J | 70,485 | 27.75 | V | 31,75 | 12.5 | |
| K | 61,595 | 24.25 | W | 60,325 | 23.75 | |
| L | 80,01 | 31.5 | ||||
| Marquee glass 60,5cm (60,325cm?) x 16,5cm (23,75" x 6,5") | ||||||
Table 1 above shows Carstem Carlos's measurements of an original, Centipede arcade cabinet, as found on ArcadeControls.com .